Is it good? Is it fun? I’ve been asking myself this lately when I’m drawing in my wee Royal & Langnickel sketchbook. Seems obvious but sometimes you forget y’know, drawing should be fun …otherwise, why bother? Anyway these were fun, not necessarily good but I’m enjoying sketching again… and colouring with Frenden brushes in CSP is always a blast.
I’ve been itchin’ to ink over some more blue line work since writing my Blue no more post back in April. I sketched up a quick marsh man in Clip Studio Paint and converted the line art to Cyan.
I printed it onto an A5 sheet of cold pressed watercolour paper (200gsm) and inked with a Pentel brush pen, Uni Pin fineliners and a Posca paint marker for highlights.
I got to work on this around 2pm and completed it in chunks throughout the day, approx. 2 hours altogether including quick colours in Procreate.
Mainly using the brush pen at this stage to spot blacks and create random organic shapes.I used 0.1 and 0.2 fineliners to define the vines/veins and other small details.I masked off the background and added some brayer texture before using a marker for highlights. I added a background wash and some further highlights.
Overall, I really enjoyed inking over this blue line piece, there’s a freedom to it, knowing that you could just print off another page if you messed up the inks and start again without losing your original drawing.
I’m disappointed with the brayer texture and will probably need to look at using another ink next time or practice with the roller on different paper. The masking tape also damaged the page in places so I might use masking fluid or cut out a stencil overlay on any future attempts.
The Posca marker worked really well on solid black ink but tended to mix with the brayer texture and grey wash. It’s really difficult to get a good all-round consistent line with whiteout pens like this but it’s also entirely possible that I just didn’t allow enough time for the inks and wash to dry.
I pretty much gave up on the clip studio workflow to remove the blue lines after scanning, the results looked a little faded/grey and the background wash was lost entirely after edits. The technique seems to work best on clean line art only. It’ll probably need tweaked or approached from a different angle for washes/texture. One solution would be to scan the line art and then add washes/texture using digital brushes. Alternatively, washes and textures could be scanned from separate lightboxed pages and added as multiply layers.
I adjusted the contrast/brightness in Photos before adding quick colours in Procreate.
I snapped some quick photos of my sketchbook to try out some Frenden brushes in CSP. I’ve been getting increasingly bored with digital drawing lately (just feels like a slog) but colouring on the iPad is still fun.
The search continues for my go-to textured colouring brush, y’know… the magic brush. I feel like I’ve come close to it on a few things over the years but I colour so infrequently that I can never quite remember the ones I’ve used or the combinations that have worked… I’m old.
Sketched the Finnish rapper and singer Käärijä in procreate after he melted the stage at the Eurovision semifinals, not a great likeness but I had fun.
I attempted #draweurovision but it’s pretty relentless, I only managed quick pencil sketches of a handful of artists, I’ve no idea how the brilliant Dan Berry manages to draw everyone and add watercolours every year.
Inspired by Russell Mark Olson’s Patreon I’ve been wanting to get back to drawing with ink again, specifically inking traditionally over blue line or non-photo blue on bristol board.
Alongside other work, Russell produces a page each week for Gateway City starting with pencil layouts before progressing to digital pencils that he prints as non-photo blue for inking.
Despite owning a large A3 printer I’ve never tried printing blue line comic pages. I’ve inked over non-photo blue pencil in the past but I haven’t looked seriously at a specific workflow for removing blue lines digitally from traditional inks.
I’m pretty sure Russell uses Photoshop to remove the blue line in his pages prior to colouring and I figured I’d be able to do something similar in Affinity Photo. There’s probably a macro or an obvious technique but I immediately hit a wall trying to achieve this.
I mostly use Clip Studio Paint these days and looked at it instead. Similarly, it’s not obvious how to remove blue line in CSP but I did find some basic tutorials on Pinterest/tumblr and also this helpful quick tips video from Celsys and Scott Drummond.
It’s prob not as efficient as the workflow in Photoshop but once I record it as an auto action I should hopefully save time on future pages.
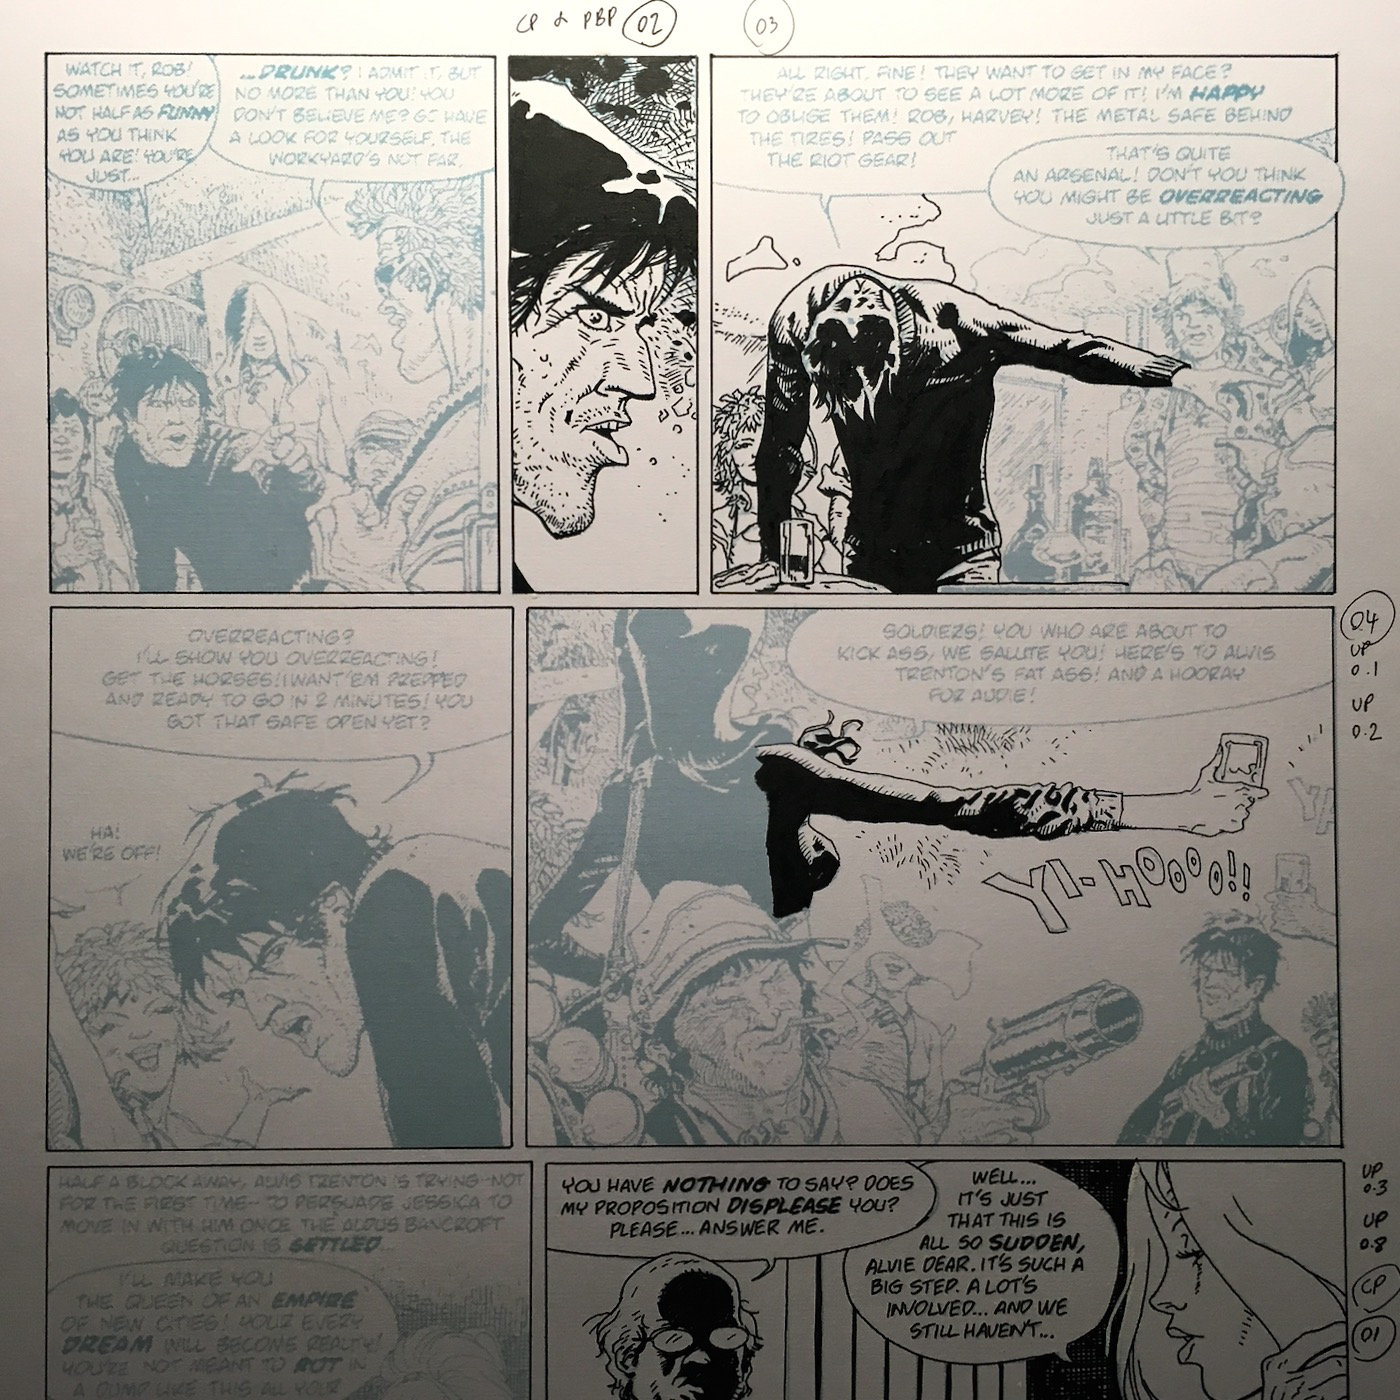
I’ve been studying a page from Jeremiah by Hermann and thought it’d be useful to try the scanning prep quick tip on it and outline the steps here on the blog.
Remove blue line from comic pages using Clip Studio Paint
I scanned the inks at 300 dpi and saved as .tiff file to the desktop
1. Import scan/image to CSP
File>Open
Layer>Duplicate Layer
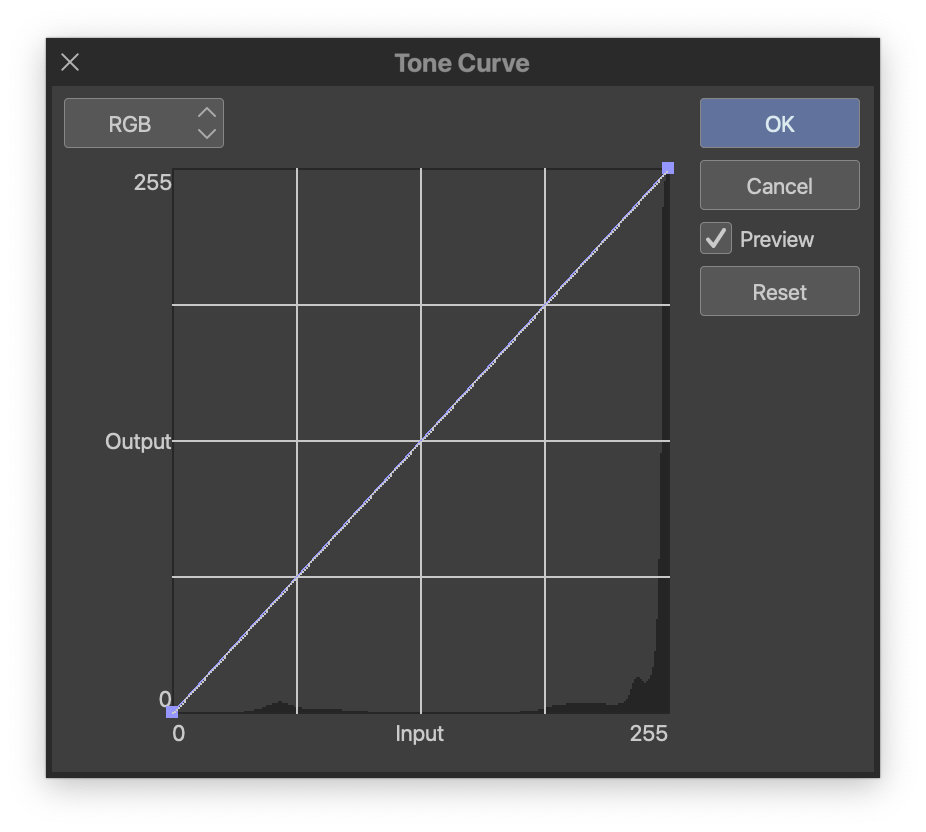
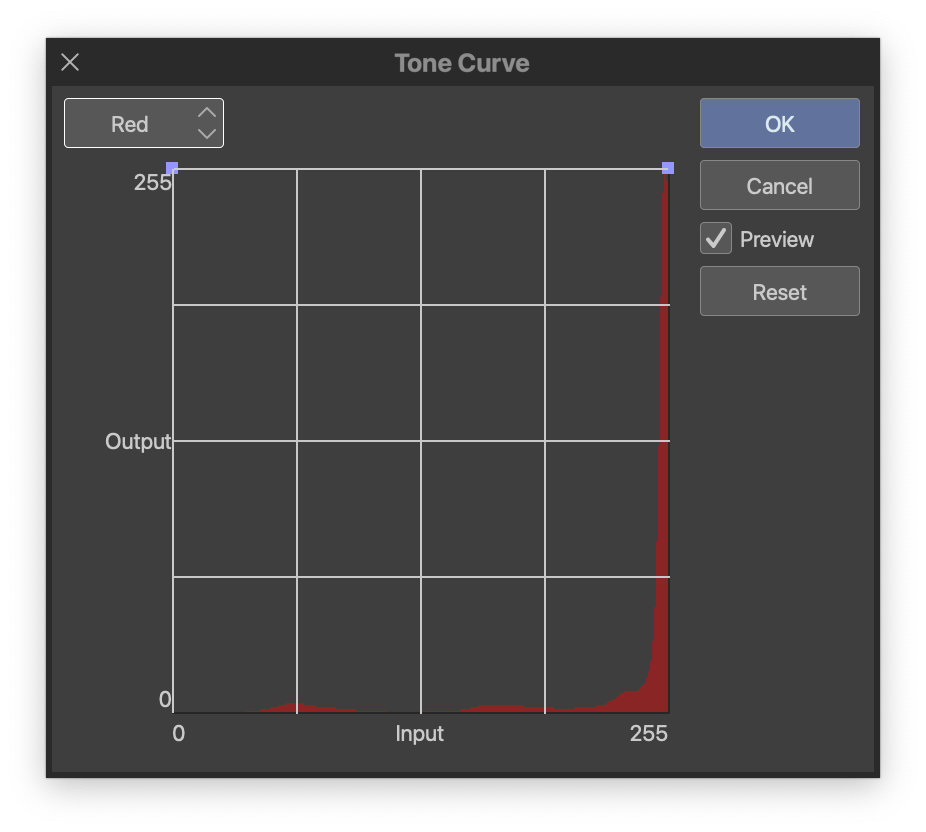
2. Tone Curve
Edit>Tonal Correction>Tone Curve
Change RGB to Red
Adjust the left handle to 255
Click OK
Edit>Tonal Correction>Tone Curve
Change RGB to Green
Adjust the left handle to 255
Click OK
3. Hue/Saturation/Luminosity
Edit>Tonal Correction>Hue/Saturation/Luminosity
Adjust Saturation to -100% (the black looks extremely faded at this stage)
4. Level Correction
Edit>Tonal Correction>Level Correction
Adjust the sliders
5. Remove Dust
Although it’s not mentioned in the video, another great feature in Clip Studio Paint is the remove dust filter. There were a few small artifacts left over from the non photo blue and this removed them outright. Just adjust the dust size to eliminate any dirt, pencils, etc.
Edit>Convert brightness to opacity
Filter>Correction>Remove dust
Pretty happy with the final result on this but it’ll be interesting to see how these steps affect dry brush, ink washes, etc.
If you’ve any other suggestions for removing blue line or some CSP tips I’d love to hear ’em.
I lucked upon a yellowed copy of Jeremiah this week in a local Oxfam stuck between a bunch of back issues that were probably donated by the FPI across the street. Published by Adventure comics (a division of Malibu Graphics) in the early 90s the book has a peculiar format but the art is unbelievably good.
The Belgian artist Hermann Huppen (better known as Hermann) is new to me but his work has clearly had a big impact and influence.
The Heirs (1991) #1–2 translates Jeremiah 3: Les Héritiers Sauvages (1980)
There’s not much available online about Hermann’s process or tools but I gleaned a few things from this video watching his effortless line and mastery with a brush, just incredible.
A few years back the black ink on my Brother DCP-6690CW stopped printing entirely. I hadn’t been using it regularly and thought at the time that the ink just dried out. This is a fairly common complaint about Brother printers and the black ink specifically. I purchased a head cleaning kit from Printhead Hospital, basically two bottles of cleaning solution supplied with a syringe and tube to be attached directly to the ink nozzles. It’s a good kit and the guys at printhead hospital were really helpful providing advice by email when the first cleaning failed. After a few more unsuccessful attempts I gave up and purchased a wee Epson XP-352 for some general printing and wedding invitations I was producing that week. I kept the Brother for the A3 scanner and the document feeder which still proved really useful.
It’s always irritated me that I wasn’t able to fix the Brother and at the end of last year I contacted a few local tech repair shops to see if anyone would look at it. Unsurprisingly it was a resounding no, most of the guys saying that printers have moved on, they’re much cheaper now or it’s just not worth it, etc.
It’s an old printer, I purchased it in 2009 for about £270 and I’d likely have to spend a similar amount to purchase a new A3 printer/scanner. Essentially, if I poked around inside and messed it up entirely I’d have nothing much to lose, I could always buy a shiny new model or just settle for the wee Epson.
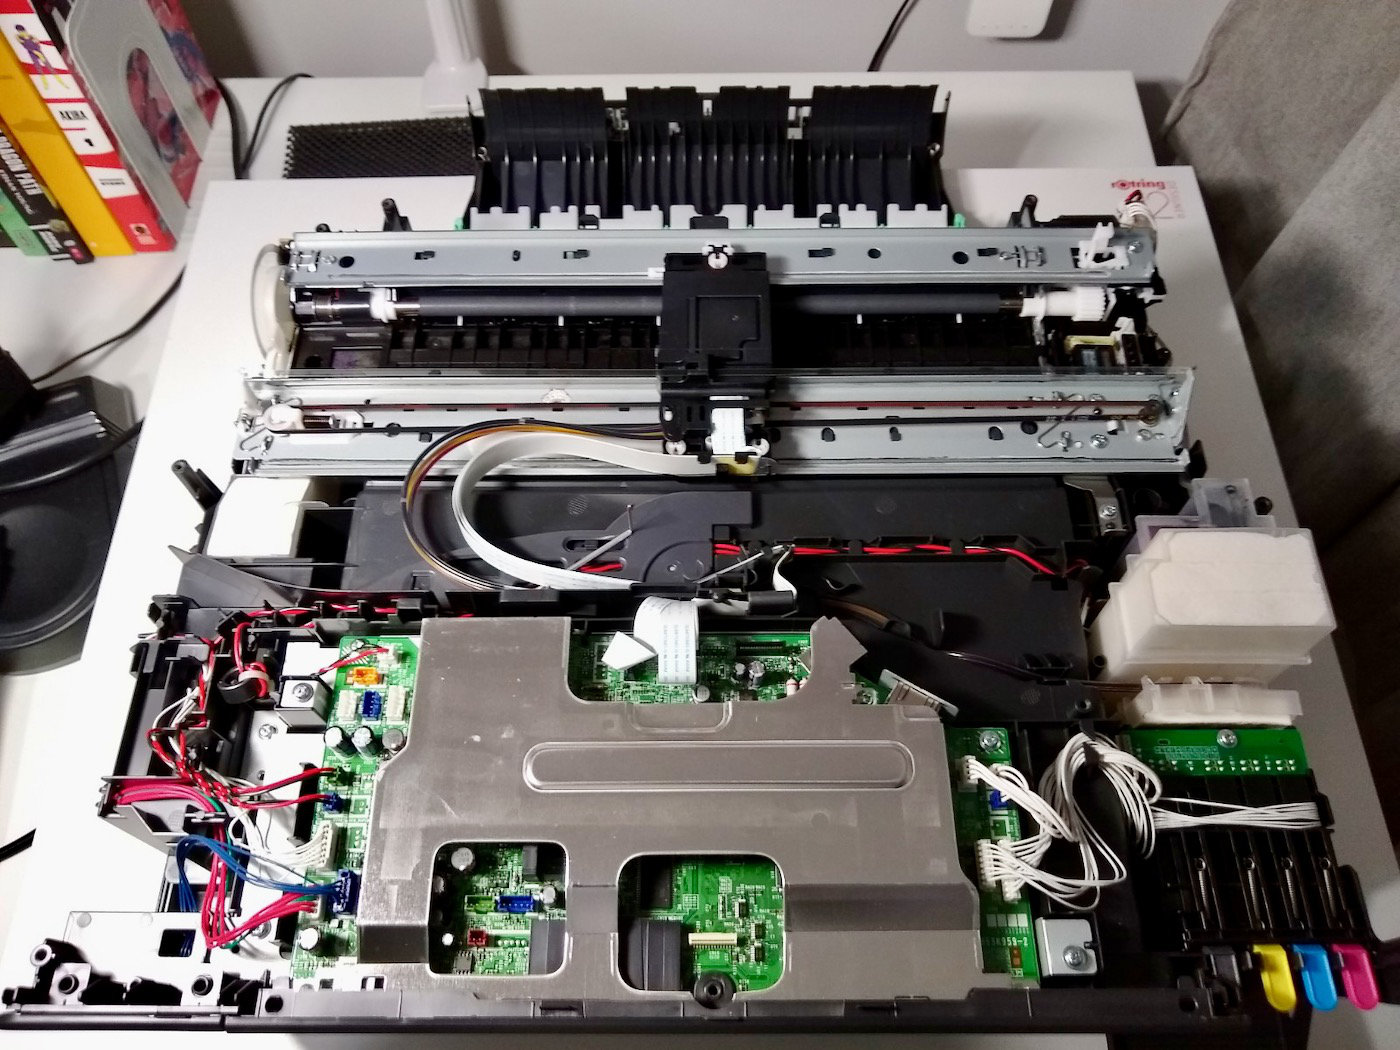
In practice it was actually pretty straightforward, the trickiest part was finding the time to work on it and after dismantling/reassembling the Brother a few times I started to feel pretty confident about repairing this thing.
I took photos at each stage for wire placements, etc., until I got the hang of stripping it down. The photos in the IFIXIT guide varied slightly and were simply too small.
I was initially quite precious with the printhead removal until I watched some footage of similar printers being stripped for parts and refurbished on Youtube.
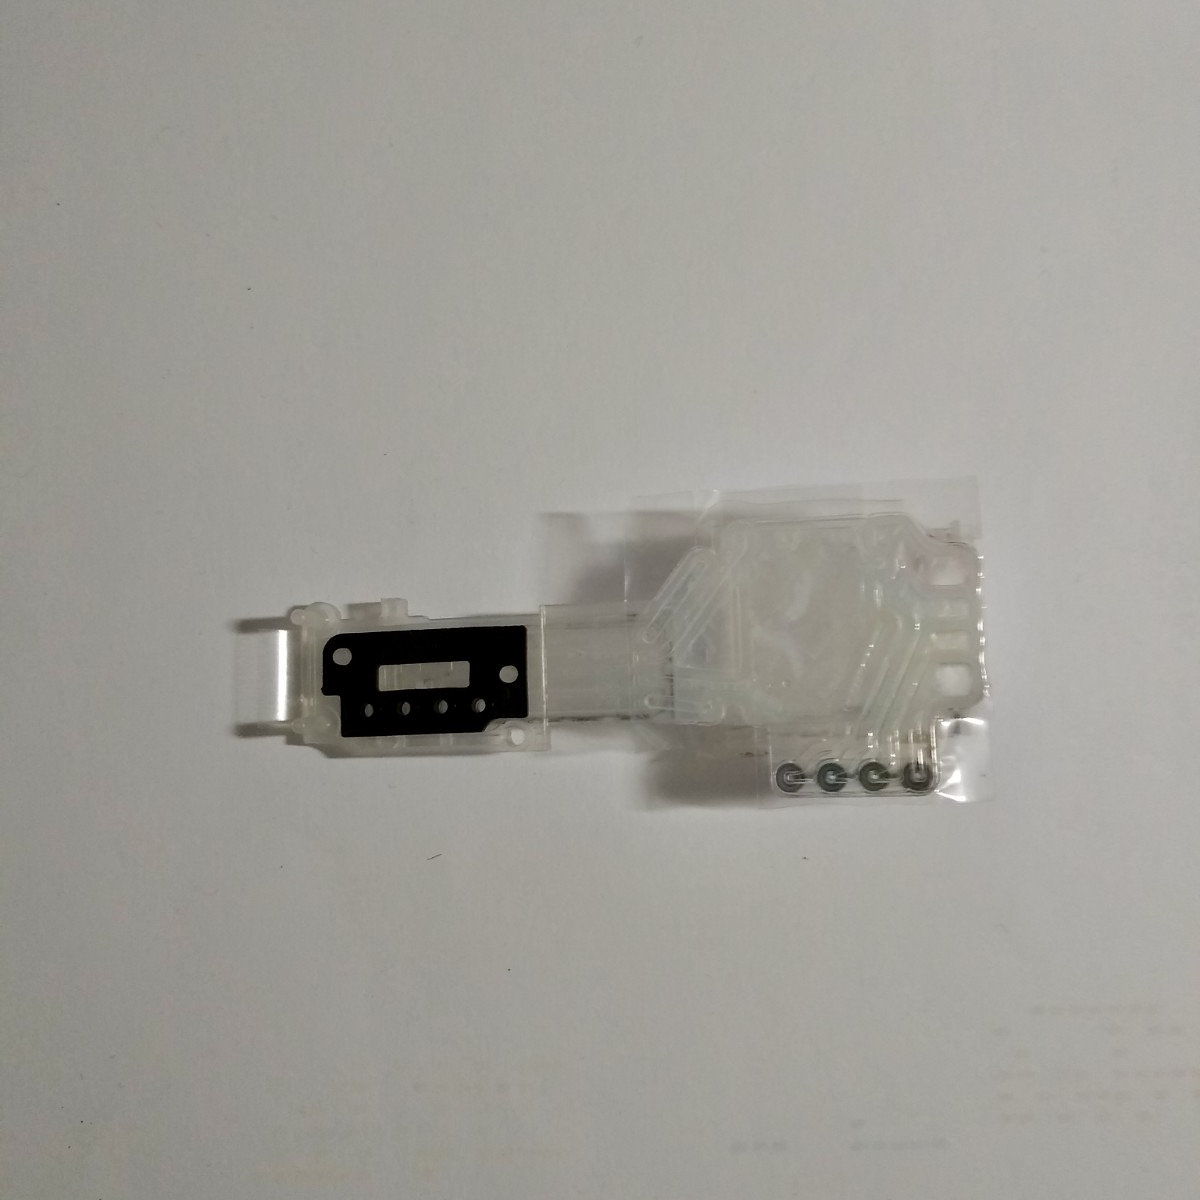
Here’s the old printhead and ink damper after the initial cleaning. I had hoped that I could simply clean the head but ultimately realised after a few print quality checks that it was faulty and I’d need a replacement. I made an offer on a seller refurbished printhead and it arrived within a few weeks.
Prices have increased since I purchased so I’d recommend making an offer in the first instance
After installing the refurbished printhead the results from the first print quality check were less than encouraging.
This is our starting point, zero K but bizarre that Y,C and M are still looking pretty good
It still wasn’t printing black but I figured there could be some air in the lines after disconnecting and then reconnecting the printhead. I used the head cleaning kit to flush the ink damper/printhead and also ran a purge operation in maintenance mode (details below).
Entry into the maintenance mode
Press the menu key
Press the Black Start (Mono Start) key on the control panel. Next press the Scan key four times
The machine beeps for approx. one second and displays * MAINTENANCE* on the touch panel
Function Codes
Function
09
Test Pattern
76
Purge operation
99
Exit from Maintenance Mode
I made myself a cuppa before printing another quality check.
We have K!!! Weirdly the Y and M are worse, time to purge and try again
Much better, I breathed a sigh of relief and tried again after wiping excess ink from the print head.
While still not perfect I was pretty chuffed with this result considering where I started
At this stage I was hesitant to run any more purges as things were looking pretty good. Any more head cleaning would in all likelihood make the print quality much worse.
The print comparison from before and after shows a big improvement so overall, not a bad result, not perfect by any means but good enough for me.
The lesson here kids, use your printer regularly or you’re gonna have a bad time.